Reidbury's Kitchen

Food thoughts, recipes and billowing smoke from a home cook's kitchen in London


Leave a comment

Spiced Bulghar Pilaf with Fish

Spiced Bulghar Pilaf with Fish

Spiced Bulghar Pilaf with Fish

I’m trying to be a bit healthier in my food options at the moment, and I took a look on the Good Food website for low-ish calorie dinner options with fish. There’s so many to choose from, but I narrowed the options down and Paul suggested he was in the mood to try Spiced Bulghar Pilaf with Fish. The ingredients list made this sound quite Middle Eastern and I expected the bulghar wheat to be full of flavour given the fish is not massively seasoned (just a bit of salt, pepper and lemon). Unfortunately I was disappointed with the end result. I kept tasting this as I cooked it, and realised early on that the flavour was mostly coming from the cumin seeds, but even then it was quite bland. Perhaps the rose harissa I used wasn’t as spicy as it should’ve been (although the jar was freshly opened, so I don’t know how true that is), or perhaps my expectations were too great, but overall I felt like it needed more heat. I added Ras el Hanout spice mix AND some chilli powder, along with more lemon but in the end I was still disappointed. Also, you cook the pilaf in a pan and then add the fish on top to cook through – as expected, the pilaf started to burn onto the bottom of the pan before the fish was cooked! Another challenge. But, Paul did like this dish so maybe I just personally didn’t get on with it…

KB rating 5/10. PR rating 7.5/10

Spiced Bulghar Pilaf with Fish (serves 4)

Ingredients: 

  • 1 tbsp olive oil
  • 2 onions, finely sliced
  • 3 carrots, grated
  • 2 tsp cumin seeds (I personally thought this was too much)
  • 2 tbsp harissa (I added another tbsp in addition to the listed amount)
  • 200g bulghar wheat
  • 6 dried apricots, chopped
  • 700ml weak chicken stock (made with one stock cube)
  • 200g baby spinach
  • 4 firm white fish fillets
  • 4 thin lemon slices

Method:

Heat the oil in a lidded flameproof casserole dish. Tip in the onions and cook for 10 minutes until soft and golden. Add the carrots and cumin, and cook for 2 minutes more. Stir through the harissa, bulghar and apricots, pour over the stock and bring to the boil. Cover and simmer for 7 minutes.

Add the spinach and stir through until just wilted. Arrange the fish fillets on top, add a slice of lemon on each and season. Replace the lid and cook for 8 mins, keeping over a low-ish heat.

Turn heat to low and cook for 7-8 minutes more until the fish is cooked through and the bulghar is tender. Season with pepper and serve.


Leave a comment

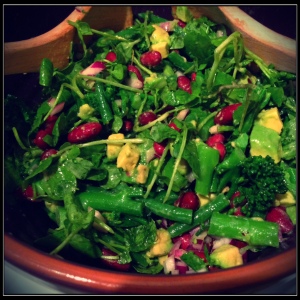
Beans and Greens Salad

Beans and Greens Salad, Olive Magazine April 2014

Beans and Greens Salad, Olive Magazine April 2014

For someone who enjoys cooking so much, I tend to be very lazy when it comes to making an effort on side dishes. I don’t really know why, but it’s something I’d like to focus more on. I decided to start this by making a salad I saw in Olive Magazine (April 2014 issue) to serve with the Greek Chicken Flatbreads I posted here. Whilst Beans and Greens Salad doesn’t necessarily sound the most exciting, it really does taste far more interesting than you’d think. It’s very fresh and zingy and works well as a side dish or, I reckon, brilliantly on its own if you added a bit of feta or chicken to bulk it up.

KB rating 8/10. PR rating 8/10

Beans and Greens Salad (serves 4)

Ingredients:

  • 1 x 400g tin kidney beans, rinsed and drained
  • 100g green beans, blanched and cut into 3cm pieces
  • 200g tenderstem broccoli, chopped into small pieces and blanched
  • 1 small avocado, peeled and diced
  • 2 stalks celery, sliced
  • ½ red onion, finely diced
  • Good handful of baby watercress
  • 2 tbsp red wine vinegar
  • 1 tsp Dijon mustard
  • Olive oil

Method:

Put the first 7 ingredients in a bowl. Whisk the vinegar and mustard together, then whisk in 3 tbsp olive oil and season. (I took the lazy option in making the dressing by adding all the ingredients to a clean jar, and shook it vigorously until everything was combined!). Add to the salad, toss everything together. Serve with crusty bread if preferred.


Leave a comment

Chicken Cacciatore

Chicken Cacciatore, Weight Watchers

Chicken Cacciatore, Weight Watchers

So now I’m back from holidays I can track back through my previous recipes and work out what I’ve cooked! It did make me realise how much I rely on this blog to jog my memory on dishes I’ve cooked!

Keeping on track with Weight Watchers whilst I was in Spain proved very difficult, but here’s a recipe I cooked before I went – when I had got into a nice, smug point-counting routine! A very oddly titled Chicken Cacciatore – oddly titled because this is actually a spicy chicken pasta dish and I only realised that after committing myself to trying it. I’m actually really glad I tried it as, on paper, it’s not something I’d ordinarily go for. The full recipe is here

The picture on the website made this look really watery, but actually my version was like a rich tomato pasta sauce, and I packed it with chilli flakes to give it some welly. It turns out that if you’re on a diet it makes sense to whack chilli in everything – very healthy, very low calorie and peps up the flavour in any dish! Overall, a good ‘home from work’ supper.

KB rating 7/10. PR rating 8.5/10. Weight Watchers Pro Points – 8 per serving.

Chicken Cacciatore (serves 4)

Ingredients:

  • 225g pasta
  • 5 sprays of calorie controlled cooking spray
  • 2 sprigs fresh parsley, chopped
  • Half a medium onion, chopped
  • 2 garlic cloves, crushed
  • 1 medium pepper (ideally green), diced
  • 125g mushrooms, sliced
  • 450g chicken breast, cut into 2 inch pieces
  • 1.5 tsp curry powder
  • 2 tsp dried basil
  • Half teaspoon of salt
  • Quarter teaspoon of black pepper
  • 1 x 400g chopped tomatoes
  • (And optional, but I recommend – chilli flakes to taste)

Method:

Cook pasta according to package instructions. Drain and cover with foil to keep warm.

Meanwhile, heat low fat cooking spray in a large saucepan over medium-high heat. Add onion, garlic, pepper, and mushrooms and sauté for 4 minutes until vegetables are tender and mushrooms release juice. Add chicken and sauté for another 5 minutes until golden brown on all sides. Add the basil, curry powder, salt, and pepper and stir to coat.

Add tomatoes and bring to a boil. Reduce heat to low, partially cover and simmer 15 minutes. Remove from heat and stir in parsley.

Transfer pasta to four shallow bowls and spoon chicken mixture over top.


Leave a comment

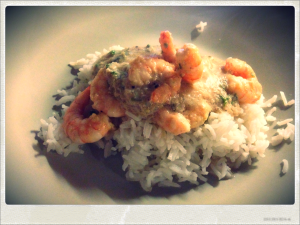
Good-For-You Green Curry with Prawns

Good-For-You Green Curry with Prawns

Good-For-You Green Curry with Prawns

Last Thursday was one of Paul’s ‘fast’ days (as he’s doing the 5:2 diet), so I had to find something that was low calorie for him and low points for me. I settled on Good-For-You Green Curry with PrawnsHaving put this recipe into Weight Watchers Recipe Builder it came out at only 3 points per serving without the rice. Rice, it turns out though, is a massive hit in terms of points. In fact the 50g serving I had was 5 points. Grr. But anyway, this meal is really quite substantial for such a low 8 points value!

I did, however, bugger up my organising skills. For anyone who knows me, I do operate my shopping and kitchen processes like a military chief, so I was beyond apoplectic when I realised I didn’t have any coriander and that’s a pretty integral component. Paul, having fasted all day and played football, had no energy whatsoever and reminded me a bit of a balloon you find behind the sofa a few days after a party. Even in my rage, I really couldn’t send him back out into the cold to go and forage herbs for me. (Plus the fact he’s still not sure of the difference between parsley and coriander). So we had to do without. And I really think that affected the taste of the dish. It just tasted a bit more bland than I expected, particularly surprising when the first part of the recipe involves making a really fragrant curry paste. Even though it’s not in the recipe I added a huge squeeze of lime to try and pep it up a bit, which helped a little. But all is not lost with this dish – even though it fell a bit flat this time, I am going to make it again. But with loads of coriander this time, some more chilli and perhaps a few other  flavourings dependent on what’s sat in the cupboard.

KB rating 6.5/10. PR rating 7/10. Weight Watchers Pro Points: 3 per serving (plus rice)

Good for You Green Curry with Prawns (serves 4)

Ingredients:

  • 3cm piece ginger, roughly chopped
  • 2 garlic cloves , roughly chopped
  • 1 small onion, roughly chopped
  • 2-3 green chillies , seeded and roughly chopped (I used 3, but would actually add more next time)
  • 1 tsp ground cumin
  • 2 tsp ground coriander
  • 4 cardamom pods , split and seeds crushed
  • 100ml chicken stock
  • 165ml tin half-fat coconut milk
  • a large bunch coriander , finely chopped
  • a small bunch mint , leaves finely chopped
  • 400g large raw peeled prawns

Method:

Put the ginger, garlic, onion, chillies and all of the spices in a food processor and whizz to a paste. Add a splash of water if you need to bring everything together.

Heat 1 tbsp oil in a pan and fry the paste for 5 minutes until you can smell the garlic, ginger and spices. Add the stock and coconut milk and simmer for 10 minutes then add the herbs and prawns and simmer for a further 3 minutes until the prawns are pink and cooked through. Serve with steamed basmati rice.


Leave a comment

Chilli Beef Meatballs in Warm Pittas

Beef Chilli Meatballs in Warm Pittas

Beef Chilli Meatballs in Warm Pittas

One of the other challenges in cooking healthy food is keeping a very meat-loving boyfriend happy too! So last weekend I decided to try and find a happy compromise – hello Chilli Beef Meatballs in Warm PittasThere’s beef, there’s chilli, there’s bread. Although I have to admit, there wasn’t a huge volume of any of those items! These portion sizes are teeny weeny, and it’s quite panic-inducing when you see just how small the meatballs are. You make 6 out of 125g of beef so they’re proper wee. But somehow when you add the bread and salsa it isn’t too shabby for a lunch at all. Unfortunately because one of these pittas is 8 Weight Watchers Pro Points I couldn’t really do my usual trick and double up the portion size. But I would do that for Paul in the future – he said that if there were two pittas each he’d have upped his score to 9! Greedy bugger.

KB rating 8.5/10. PR rating 8/10. Weight Watchers Pro Points: 8 per serving

Chilli Beef Meatballs in Warm Pittas (serves 2)

Ingredients:

  • 125g lean beef mince (10% fat)
  • Half small onion, finely chopped
  • 5g Medium Fajita seasoning
  • 1 tbsp fresh thyme or parsley
  • 5 sprays calorie controlled cooking spray
  • 1 tbsp Sweet Chilli sauce
  • Pinch salt and freshly ground black pepper
  • 2 medium pittas, white or wholemeal
  • Handful of spinach, to serve

For the red onion salsa:

  • Half a small red onion, very thinly sliced
  • 1 large tomato, finely chopped
  • 1 medium cucumber, chopped into 2cm cubes
  • 1 tbsp white wine vinegar

Method:

Mix together the beef mince, onion, fajita spice mix and the thyme or parsley. Season and then form the mixture into 6 evenly-sized balls.

Spray a non stick frying pan with cooking spray and add the meatballs. Cook for 12-14 minutes, turning occasionally. Add the sweet chilli sauce and cook for another minute, turning the meatballs over until glossy.

While the meatballs are cooking, make the salsa by combining all the ingredients. Season with salt and pepper.

Warm the pitta breads in a toaster or under the grill. Split open and then fill each one with a few spinach leaves, 3 meatballs and the salsa.


Leave a comment

Baked Tuna Nicoise

Baked Tuna Nicoise

Baked Tuna Nicoise

Another day, another Weight Watchers meal to try. I’m actually really enjoying researching suitable recipes to eat on this diet that don’t compromise on flavour. I’d like to think that any of the recipes I try would be ones I’d be happy trying even if I wasn’t point counting. And my Pinterest boards can really testify to the amount of research I’ve done. A particular highlight being the revelation that making no sugar jelly and adding loads of fruit is a 0 point dessert! And I love jelly – I’m a child of the 80s after all.

So the latest recipe I wanted to try was Baked Tuna NicoiseI am a big fan of fresh tuna, and this recipe also included potatoes which I’ve been craving! Total Pro Points per person – 8. The recipe is really straight forward and all done using one pan, which saves on the washing up too. The flavours are obviously a classic combination and they still work really well together in a baked dish. I actually thought the red onions were the star of the show here – they went really soft and seemed to soak up all the lemon and caper flavours. Definitely a winner.

KB rating 8.5/10. PR rating 7.5/10. Weight Watchers Pro Points: 8 per serving

Baked Tuna Nicoise (Serves 4)

Ingredients:

  • 500g potatoes (Vivaldi or Charlotte ideally), scrubbed and cut into large chunks
  • 10 sprays of calorie-controlled cooking spray
  • 1 large red onion, thinly sliced
  • 150g green beans, trimmed
  • 12 black olives, pitted
  • 4 large tomatoes, quartered
  • 4 fresh tuna steaks, 150g each
  • 2 tbsp lemon juice
  • 2 tbsp capers in brine
  • Pinch salt and freshly ground pepper
  • 2 sprigs fresh parsley

Method:

Preheat the oven to 180C fan, 200C, 400F, Gas Mark 6.

Put the potatoes in a roasting tray and spray with the cooking spray, tossing to coat. Transfer to the oven and bake for 20 mins.

Add the red onion and green beans to the potatoes, stir well and bake for another 1o mins. Remove the pan from the oven.

Stir the potato mixture and add the olives and tomatoes. Arrange the tuna steaks on top. Sprinkle over the lemon juice and capers and then season.

Return to the oven and bake for 8-10 minutes. Serve, scattered with plenty of chopped parsley.


Leave a comment

Teriyaki Turkey Burgers with Roasted Sweet Potato Wedges

Teriyaki Turkey Burgers with Roasted Sweet Potato Wedges

Teriyaki Turkey Burgers with Roasted Sweet Potato Wedges

It’s not even been a week on this Weight Watchers diet, but by mid-week I was desperate for something that felt like a treat. And then I saw this recipe and knew it was exactly what I needed. Bread. Chips. Burger. YES! And all for 13 points (double portion of the wedges – I still can’t get down with the teeny portions just yet). In the great scheme of things that’s healthy, but in my new Weight Watchers world that’s half of my daily points. So I really hoped it was good, otherwise what a waste!

Turns out it was wonderful. The burger is packed full of flavour and it really doesn’t feel like a compromise when you bite into it! Great Asian flavours and despite being turkey, they’re really juicy and yummy. The consistency of the burgers looked a bit gloopy before they were cooked but, despite my fears, they held together really well and kept their shape. I opted to use a non-stick frying pan rather than a griddle pan and I think I made the right choice.  The grilled spring onions are a great addition in terms of flavour and texture, and the sweet potato wedges are a perfect match as a side dish.

KB rating 8.5/10. PR rating 8/10. WW points 13.

Teriyaki Turkey Burgers with Roasted Sweet Potato Wedges (serves 4, but I doubled up on the potatoes so they served 2)

For the potatoes:

  • 2 medium sweet potatoes, washed and patted dry
  • 1 tsp olive oil
  • Quarter tsp salt
  • Quarter tsp dried rosemary (I used fresh rosemary instead, a few sprigs dotted around)

For the burgers:

  • 500g turkey mince
  • 1 tbsp fresh ginger, finely chopped
  • 1 tbsp ginger, minced
  • 1 tsp sesame oil
  • 70g teriyaki sauce
  • 25g spring onions, chopped
  • 2 tbsp coriander, finely chopped
  • 1 large egg white
  • 5 sprays cooking spray
  • 8 medium spring onions, root ends trimmed
  • 4 hamburger rolls

Method:

Preheat the oven to 220C (425F or Gas Mark 7. Cut each potato into 8 lengthwise wedges and place on a nonstick baking sheet. Drizzle with oil, sprinkle with salt and rosemary and roast for 15 mins. Then toss and roast the potatoes until they’re tender (about another 15-20 minutes).

Meanwhile make the burgers. Preheat a grill pan (or frying pan) to medium-high; cover to maintain heat.

In a large bowl mix together the turkey, ginger, garlic, sesame oil, teriyaki sauce, chopped spring onions, coriander and egg white. Combine thoroughly then make 4 burgers – about 3.5 inches across and just under an inch wide.

Place the burgers on a nonstick baking tray. Coat with cooking spray, then flip and coat the other side with spray.

Put the burgers onto the heated grill pan, flipping once, until fully cooked – about 5-7 minutes on each side. A few minutes before the burgers are done, add the whole spring onions to the pan and let them go bright green and charred – about 2 mins.

Remove the burgers and spring onions to a plate. Lightly toast the rolls and then serve each burger on a roll topped with 2 spring onions. Serve alongside the potato wedges and a little extra teriyaki if needed (note this would add to your points if you’re Weight Watching!)


1 Comment

Thai-Style Steamed Fish

Thai-Style Steamed Fish, BBC Good Food

Thai-Style Steamed Fish, BBC Good Food

Now I’ve started going back to the gym again, I’ve wanted to dig out recipes that are healthy but tasty. And this recipe was one of the old favourites – Thai-Style Steamed FishAt less than 200 calories (excluding the rice), it’s so good for you but you really don’t feel like you’re missing out on a good dinner! Add in the fact that it only takes 25 minutes to do start to finish and it’s a really good mid-week dish. Whilst the recipe states trout fillets as the chosen fish, this will work equally well with most flaky fish. And there are so many other swap outs you could do – swap pak choi for any green veg (green beans, peas, asparagus spring to mind). Swap out the lime for lemon, or the soy sauce for hoisin  – the possibilities are all there depending on what you have sat in your cupboard.

The end result is soft, flaky fish with a really fragrant sauce. Serve with jasmine rice and you’re onto a winner. It’s also nice cold – but maybe it’s just me who thinks that.

And regarding the steaming technique – I have one of those three-tier steamers, which is one of the best purchases I’ve made. Given space is at a premium in the Reidbury Kitchen, it’s great as you can cook carbs in the water at the bottom, and then sit the fish or chicken on the layer above and then veg above that. But for this recipe, you could easily just get a regular pan of water, sit the fish parcel on a heatproof plate on top and then place a lid on top of the plate.

PR rating 9/10. KB rating 9/10. WW Points: 5 (if using trout and not including rice)

Thai-Style Steamed Fish (serves 2)

Ingredients

  • 2 trout fillets (or any other fish fillet of your choosing)
  • Small knob of fresh ginger, finely chopped
  • 1 small garlic clove, finely chopped
  • 1 small red chilli, finely chopped (the recipe says ‘not bird’s eye’, although that’d work if that’s all you have)
  • Grated zest and juice of 1 lime
  • 3 baby pak choi, quartered (I can never find baby pak choi, so I just use one whopping one instead, still quartered)
  • 2 tbsp soy sauce

Method

Take a large square of foil and nestle the fish fillets side by side. Scatter over the ginger, garlic, chilli and lime zest. Then drizzle the lime juice over the top and scatter the pieces of pak choi around and on top of the fish. Pour the soy sauce over the pak choi and then loosely seal the foil to make a package – make sure you leave space at the top so that there’s room for the steam to circulate as the fish cooks.

Steam for 15 minutes – by this time the fish will be cooked and flaky, and a little sauce will have gathered at the bottom of the foil. Honestly, the trickiest part of the whole recipe is not spilling the sauce out of the foil when you’re pouring over the fish!

Serve with jasmine rice. Feel very healthy and smug.

Full recipe credit: http://www.bbcgoodfood.com/recipes/1031/thaistyle-steamed-fish